To adjust video quality, select Settings  in the video player.
This is a tutorial on how to submit a transmission of title after the death of the title owner. This video depicts a basic scenario for demonstration and training purposes only.
For more information on transmissions, visit 'Transmission of Title on Death of the Title Owner'.
Note: The information on the 'Transmission of Title on Death of the Title Owner' page includes information about submitting your application by forms; however, this Quick Tutorial pertains only to submitting by OLS.
NOT LEGAL ADVICE
This video is for demonstration purposes and is not intended to be legal advice.
ISC recommends seeking independent legal advice for all your land registry transactions.
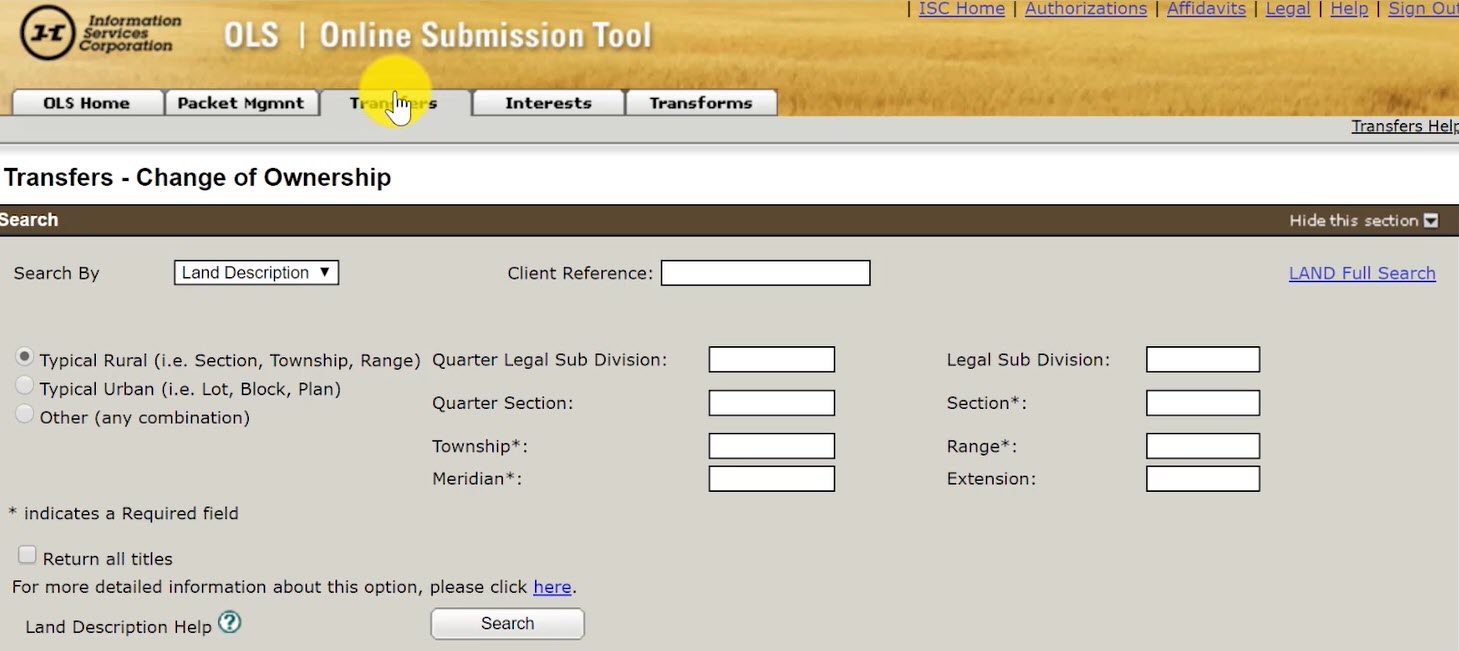
Step One: Select the 'Transfers' tab
When you are on the OLS homepage, select the 'Transfer' tab to be taken to the page where you can search for the title that will be involved in the change of ownership.
Step Two: Search for Owner of all titles involved in the transmission
Select the 'Search By' drop down menu and select 'Owner Name'
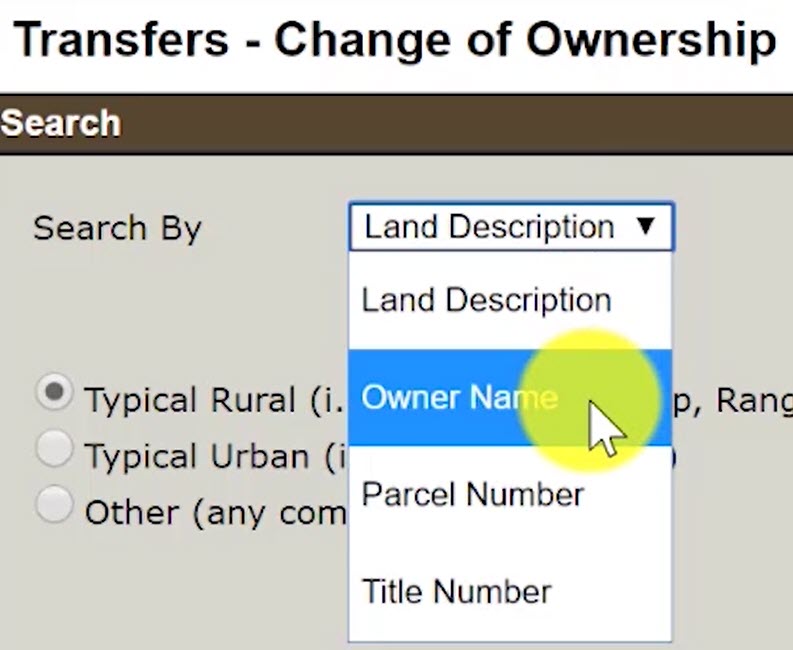
When the name fields appear, type in the name of the owner who owns all the titles that will be involved in the transmission.
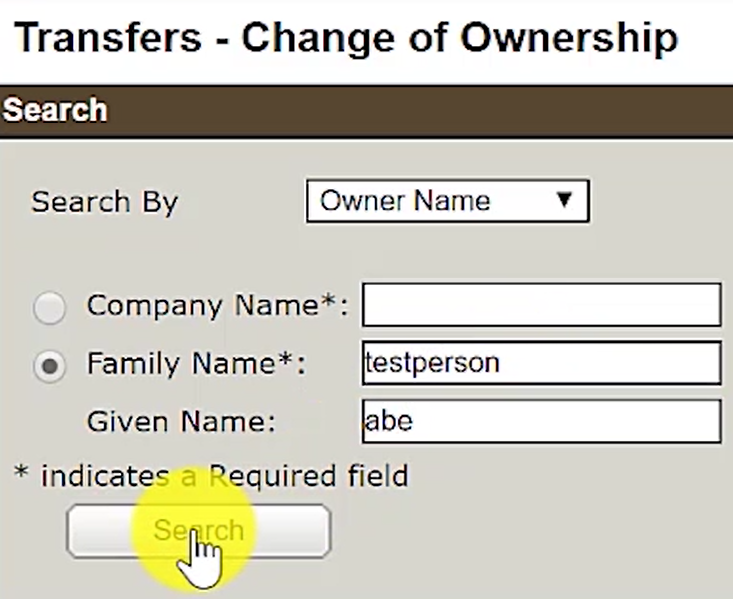
Click on 'Search' for a list of owner names. Select the correct owner name from the list.
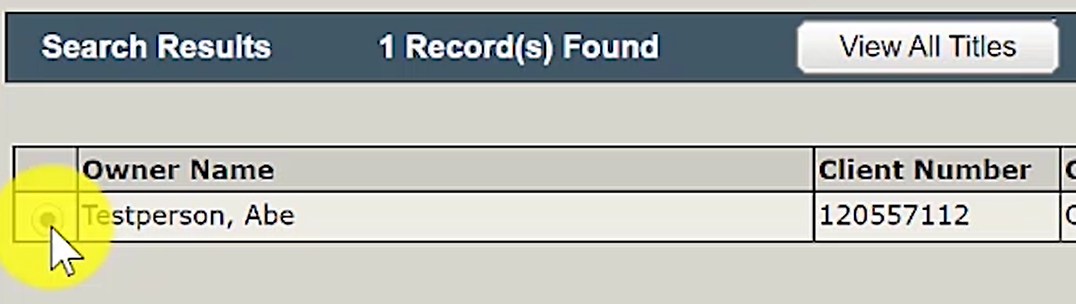
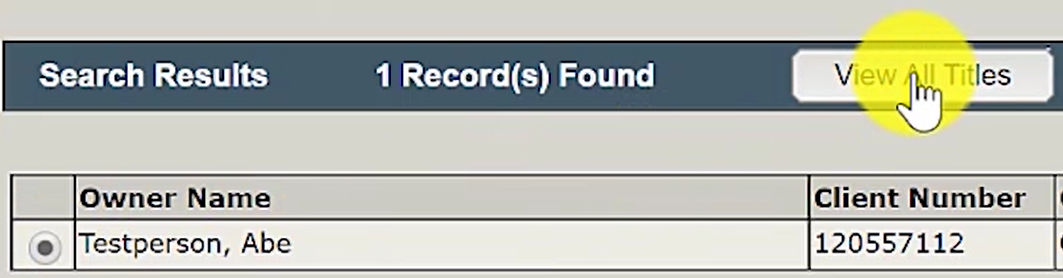
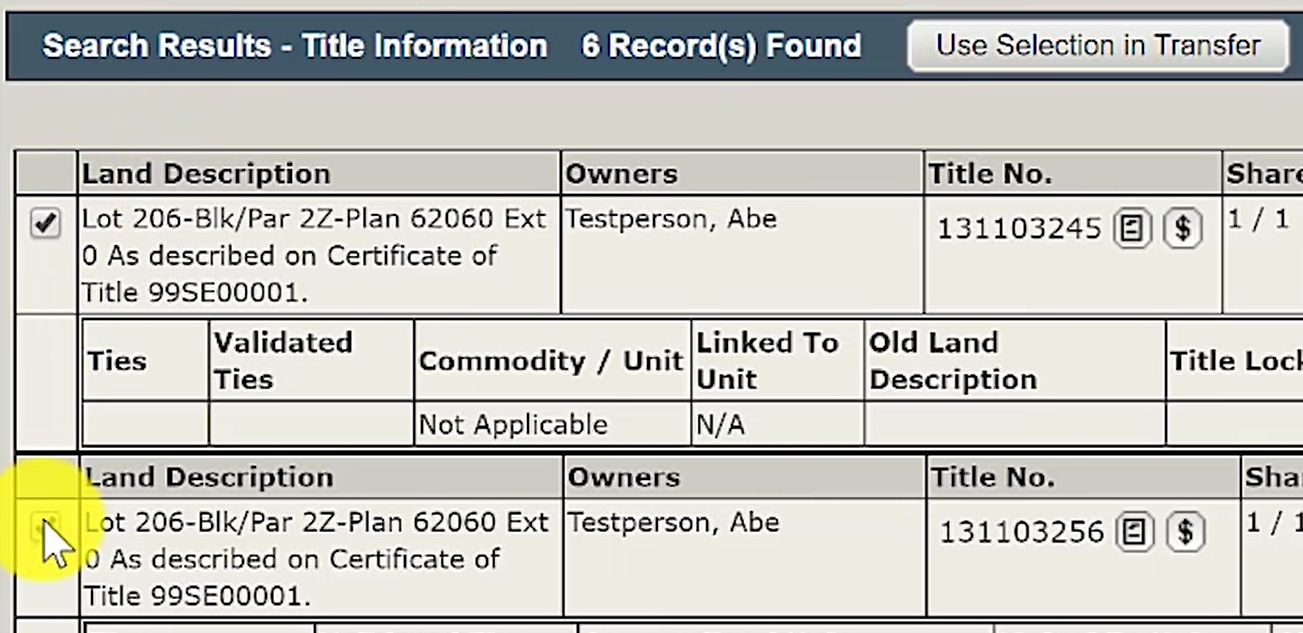
Step Three: View and Select all Titles involved in transmission
Click on 'View All Titles' for all the titles owned by the selected Owner Name.
When the list of titles appear, select all the titles that are involved in the transmission.
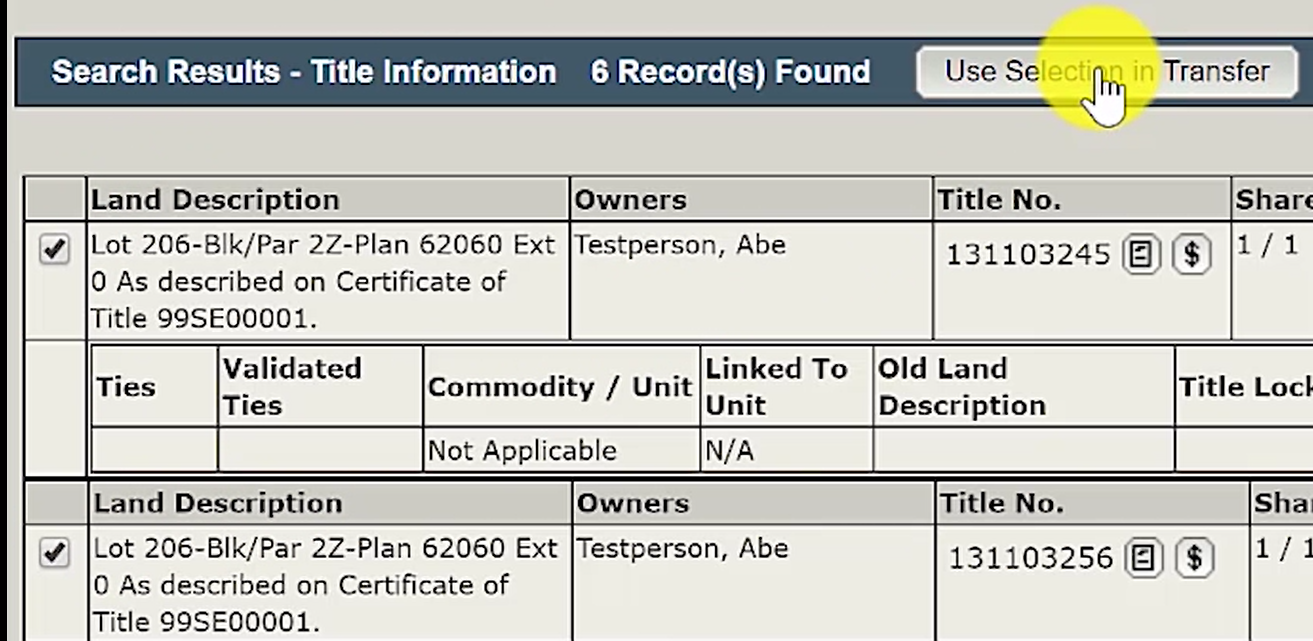
Then, click on 'Use Selection in Transfer' to include all selected titles in the transmission packet.
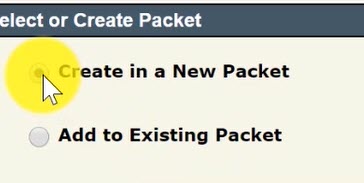
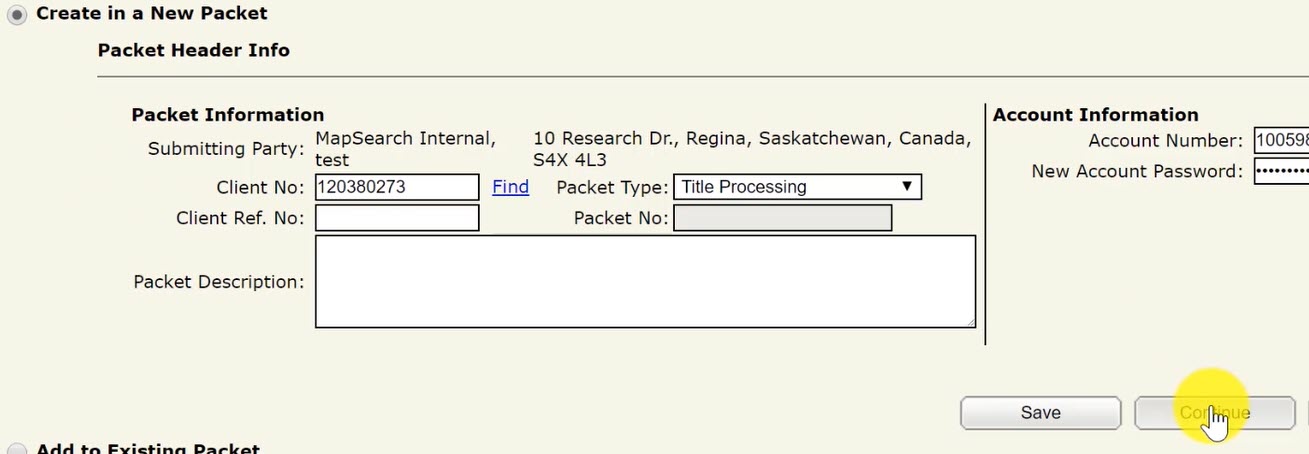
Step Four: Create new Packet
Click on the 'Create a New Packet' radio button.
Then, click on the 'Continue' button.
Step Five: Select 'Transmission' as the Transaction Type
Click on the 'Transmission' radio button to select it as the Transaction Type.
Then, click on 'Create'.

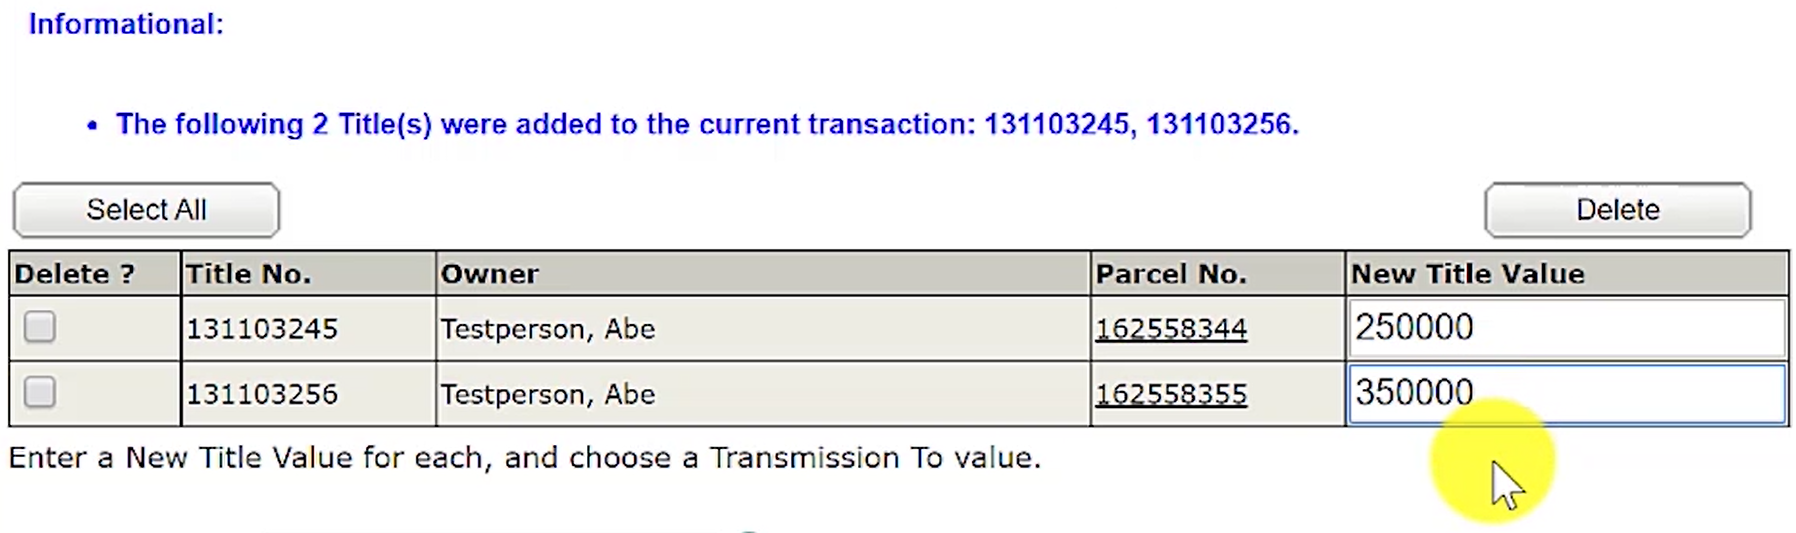
Step Six: Enter in the Title Values
Enter in the 'New Title Value' for all the titles that have been added to the packet for the transmission.
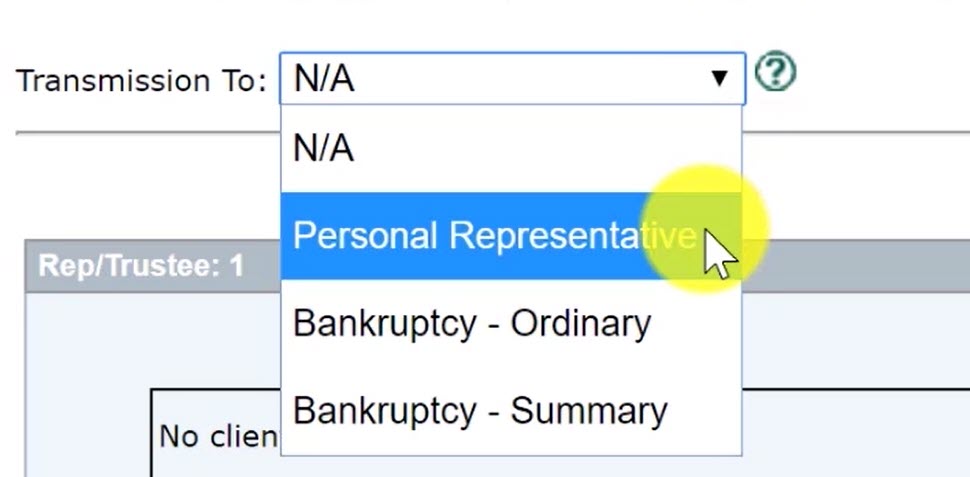
Step Seven: Select type of transmission in 'Transmission To' menu
Select the 'Transmission to' drop down menu and select the type of transmission you are trying to register.
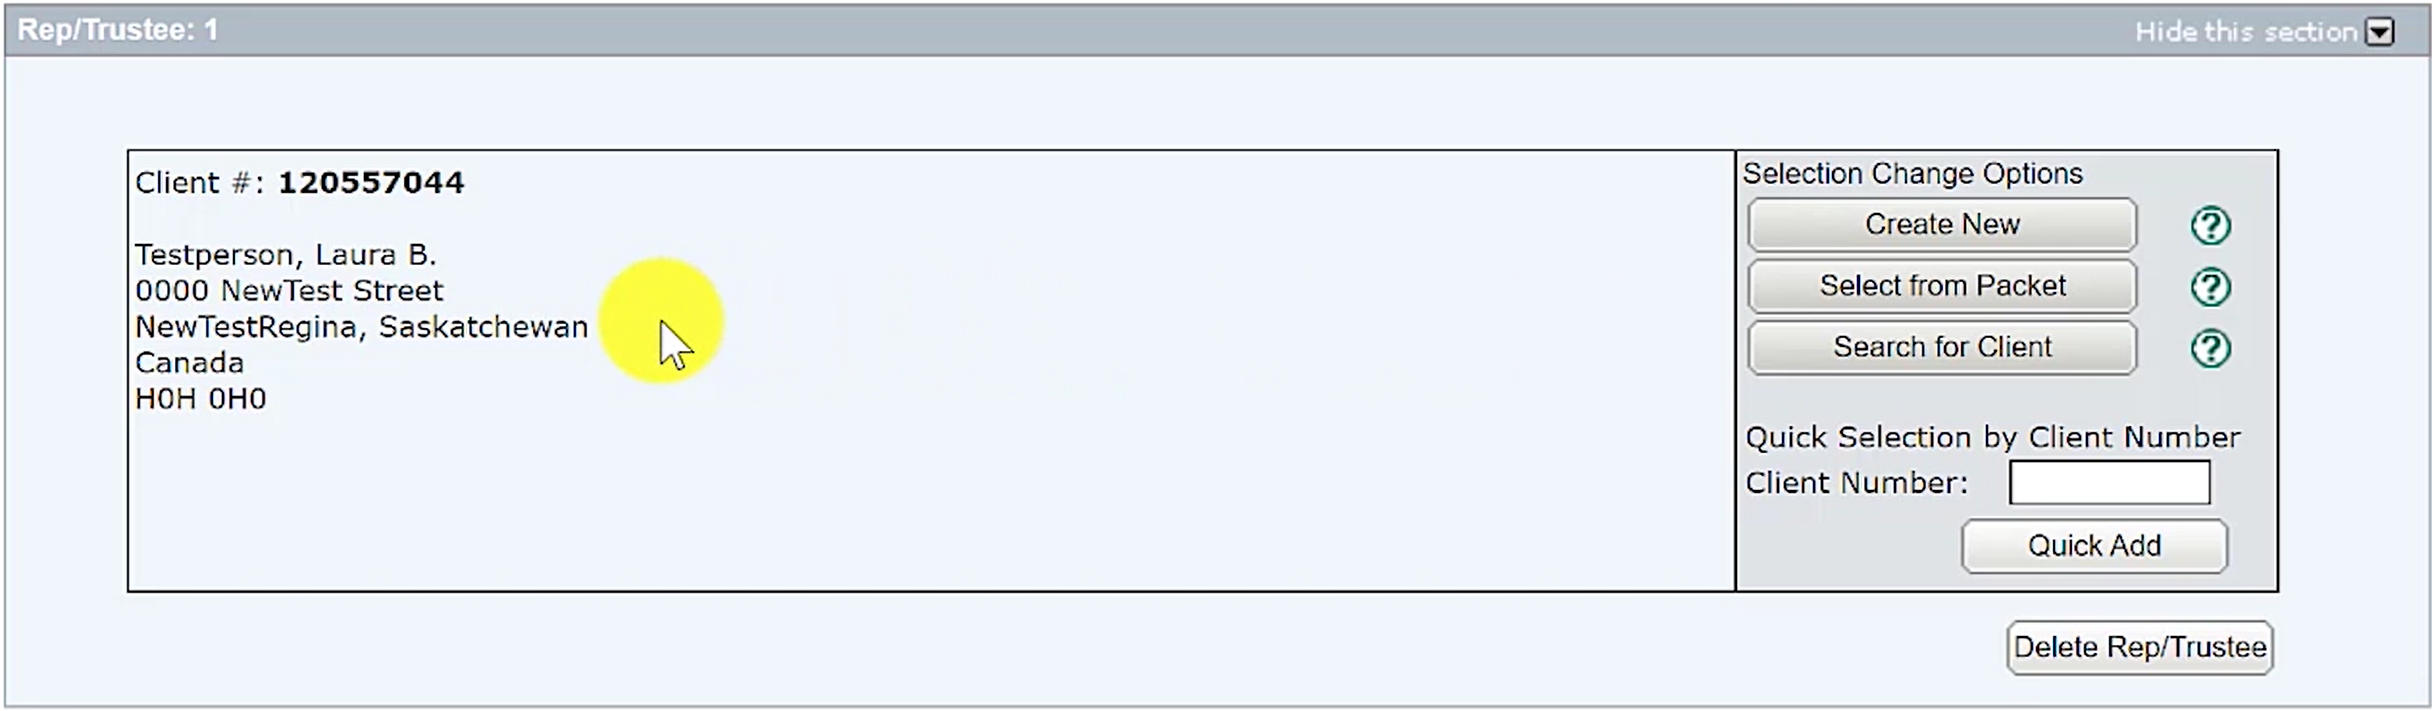
Step Eight: Search and Add the Personal Representative
Click on 'Search for Client' if the Rep/Trustee has an existing ISC client number.
If they do not have an existing client number, click on 'Create New' to create an client number.

Once the Rep/Trustee has been found in the search or created, they will be added to the packet.
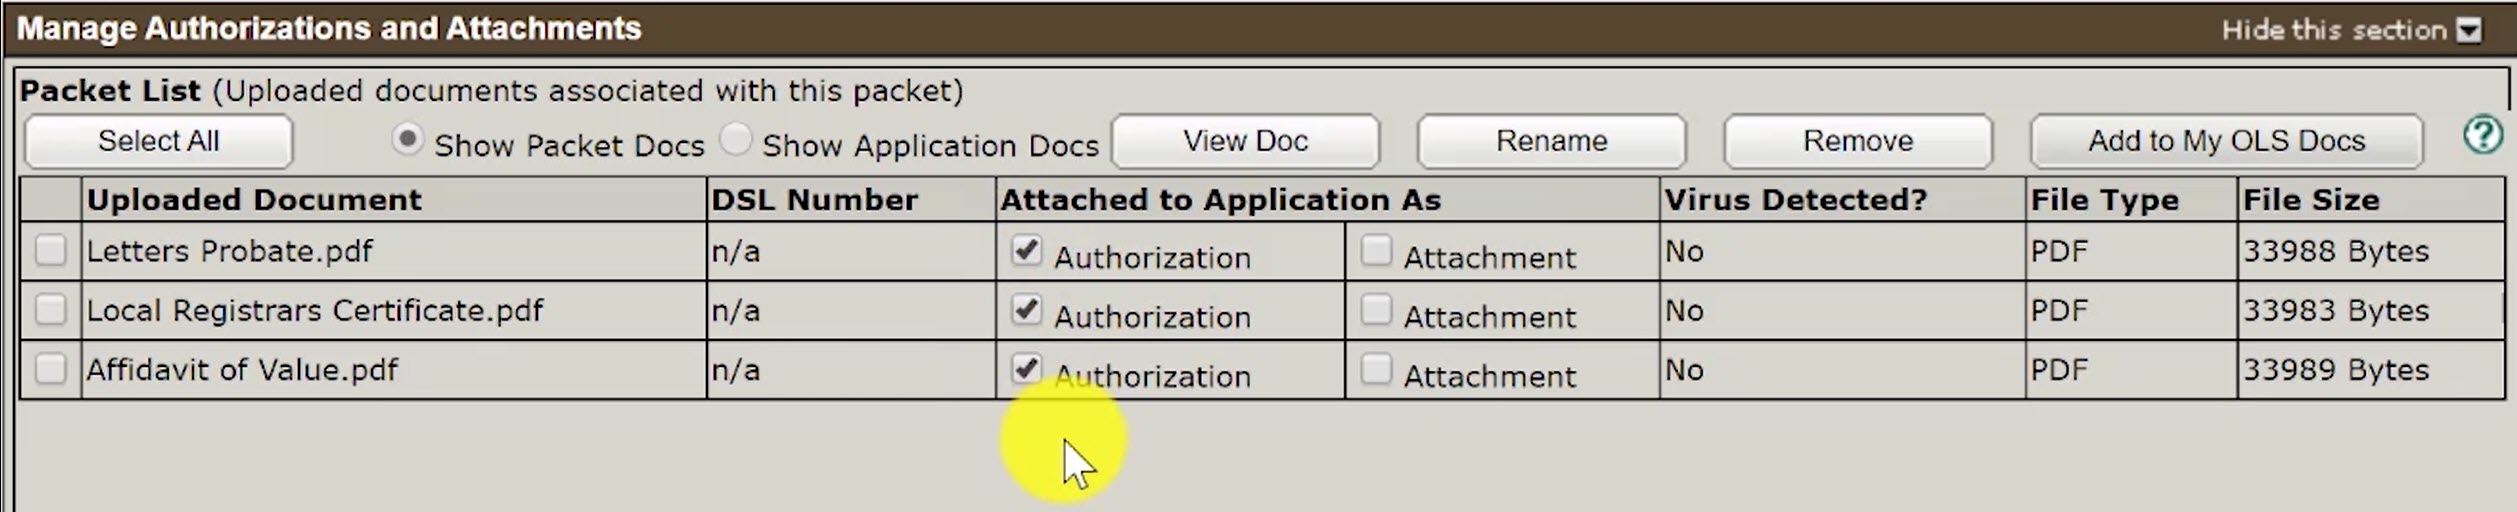
Step Nine: Upload Required Documents
The required documents for a transmission of a title after the death of the title owner includes the following:
1) Letters Probate or Letters of Administration
2) Local Registrar's Certificate, an Official Guardian's Certificate or Public Guardian and Trustee certificate
3) Affidavit of Value
4) Affidavit of Identity - Transmission to Personal Representative (if applicable only)
Affidavit of Identity - Transmission to Personal Representative: If there is a difference between the deceased's name on the title and the deceased's name on the letters probate or the letters of administration, then the personal representative (or a person acting on their behalf) must swear an affidavit of identity stating the person named on the title and in the documents is the same.
Click on the 'New Upload' button. A window will open up that will allow you to upload the required documents into the packet.

Once the required documents have been added, label them as 'Authorizations'.
Step Ten: Validate your Packet
Validate your packet by clicking on the 'Validate' button.

You should Validate your application when you are satisfied that all required elements are correct. The validation process puts the packet through automated checks to help you ensure your application meets all the required business rules.
If errors are encountered, a message box will appear to let you know there were errors or warnings during the validation.

Click on the 'OK' and scroll down to the 'Validation Errors' section to see what errors were encountered.

The 'Validation Errors' section might be hidden. Select the 'Show this section' to reveal the errors.
Validation generally take a couple of minutes depending on the size of your packet.
If there are no errors, you will receive an alert that there were no errors or warnings encountered during the validation.

Step Eleven: Submit your Packet
Optional: Click on the 'Create Summary Report' button to create a summary report of your packet. The summary report will give you the opportunity to verify the accuracy of your packet.

Once you are satisfied with the packet content, click on the 'Submit Packet' button to submit your packet.
A new window will appear to allow you to review the high level information about your packet including estimated fees.
Click on the 'OK' button to submit the packet.