To adjust video quality, select Settings  in the video player.
This is a tutorial on how to submit a Surviving Joint Tenant. This video depicts a basic scenario for demonstration and training purposes only. In our example scenario, a wife searches for her name in order to find all the titles that she and her deceased husband own as joint tenants. She then submits a surviving joint tenant registration.
When owners are joint tenants of a title, they own the title without separate shares. This form of ownership allows for the right of survivorship. If one of the owners dies, his or her share in the title may pass to the surviving joint tenant(s).
Note: This does not apply if the ownership is specified on title as “Joint Tenants with no survivorship”.
NOT LEGAL ADVICE
This video is meant for demonstration purposes and is not intended to provide legal advice.
ISC recommends seeking independent legal advice for all your land registry transactions.
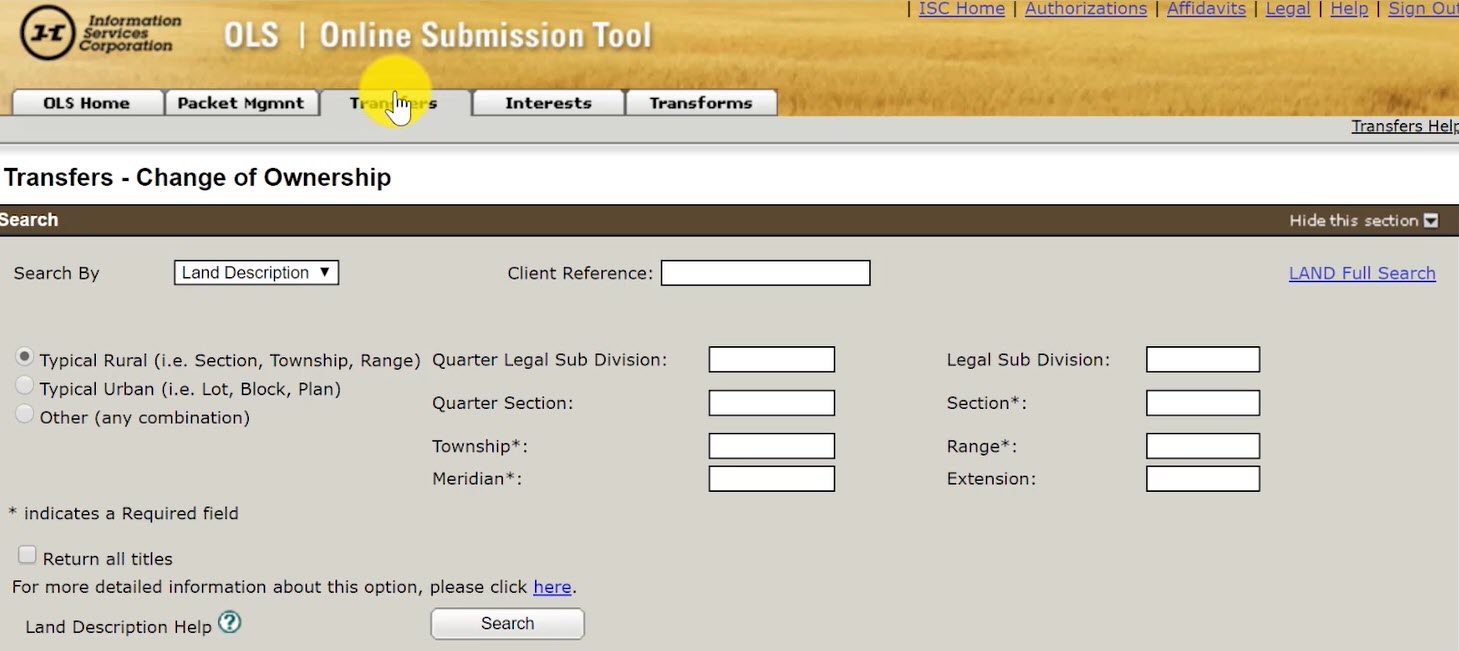
Step One: Select the 'Transfers' tab
When you are on the OLS homepage, select the 'Transfer' tab to be taken to the page where you can search for the title that will be involved in the change of ownership.
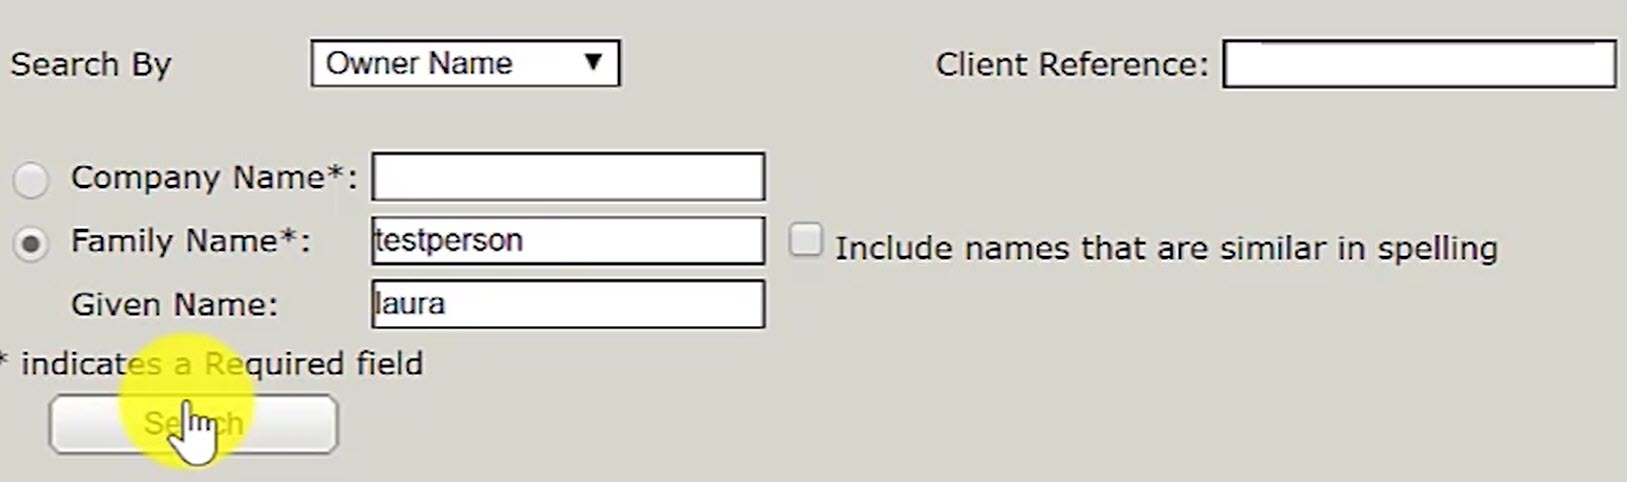
Step Two: Search by Owner Name
Type in the name of an individual who is an owner of the land title(s) involved in this transfer and hit 'Search'.
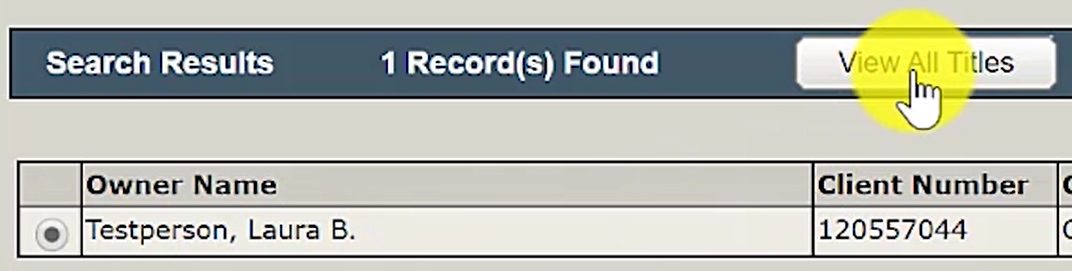
Step Three: View and select the Titles with the deceased as a Joint Owner
After selecting the owner name, select the 'View All Titles' button to view all the titles with the selected name as the owner.
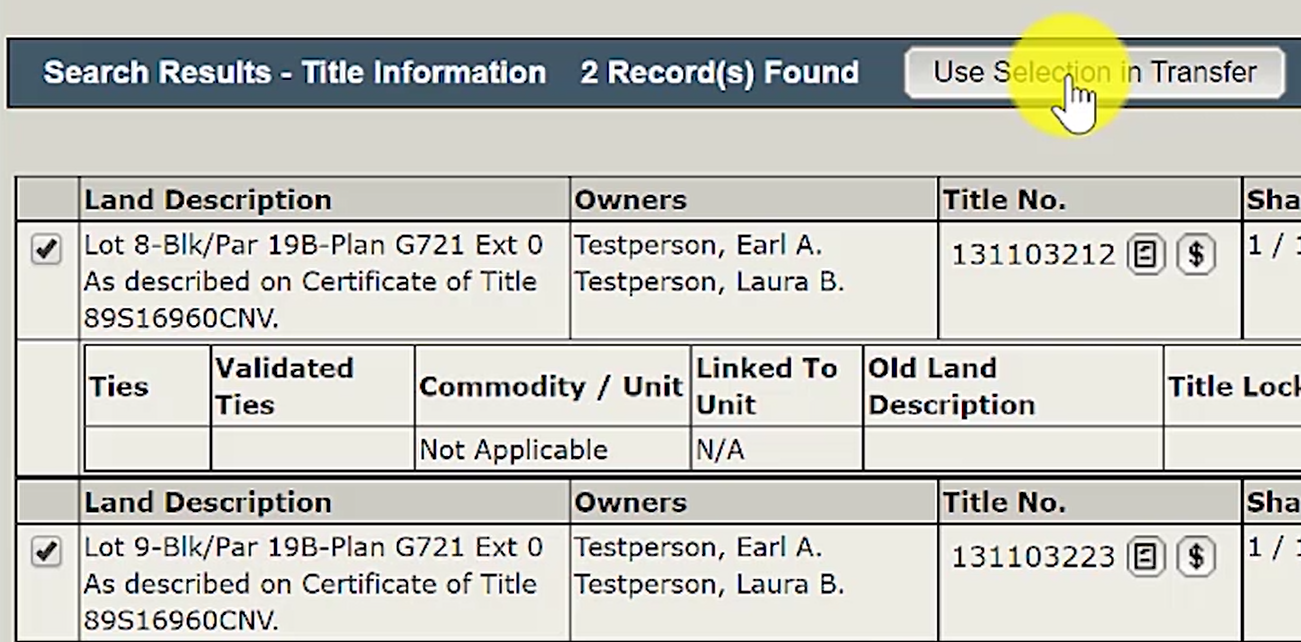
Then, select all the titles with the deceased as an owner.
Once you've selected all relevant titles, click on 'Use Selection in Transfer'.
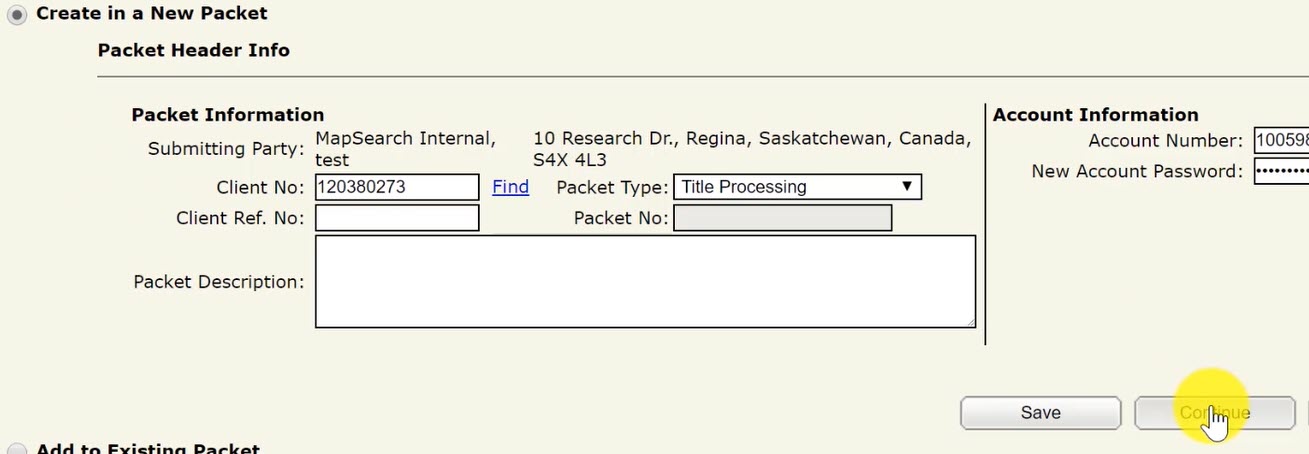
Step Four: Create a New Packet
Click on the 'Create a New Packet' radio button.
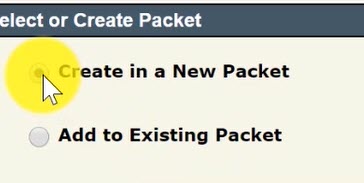
Then, click on the 'Continue' button.
Step Five: Select the Transaction Type 'Transfer to Surviving Joint Tenant'
Select the radio button for 'Transfer to Surviving Joint Tenant' under the New Transfer Transaction section.

Then, click on the 'Create' button.
Step Six: Enter the Title Values of all the titles selected
Enter the 'New Title Value' for each selected title that is jointly owned by the deceased.

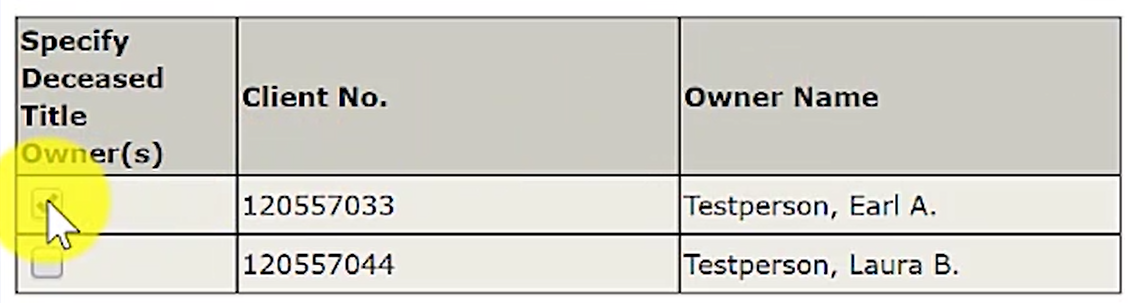
Step Seven: Select the Joint Owner who will be removed from the title.
Click on the checkbox next to the name of the deceased owner.
The selected owner name will be the one removed from the land title.
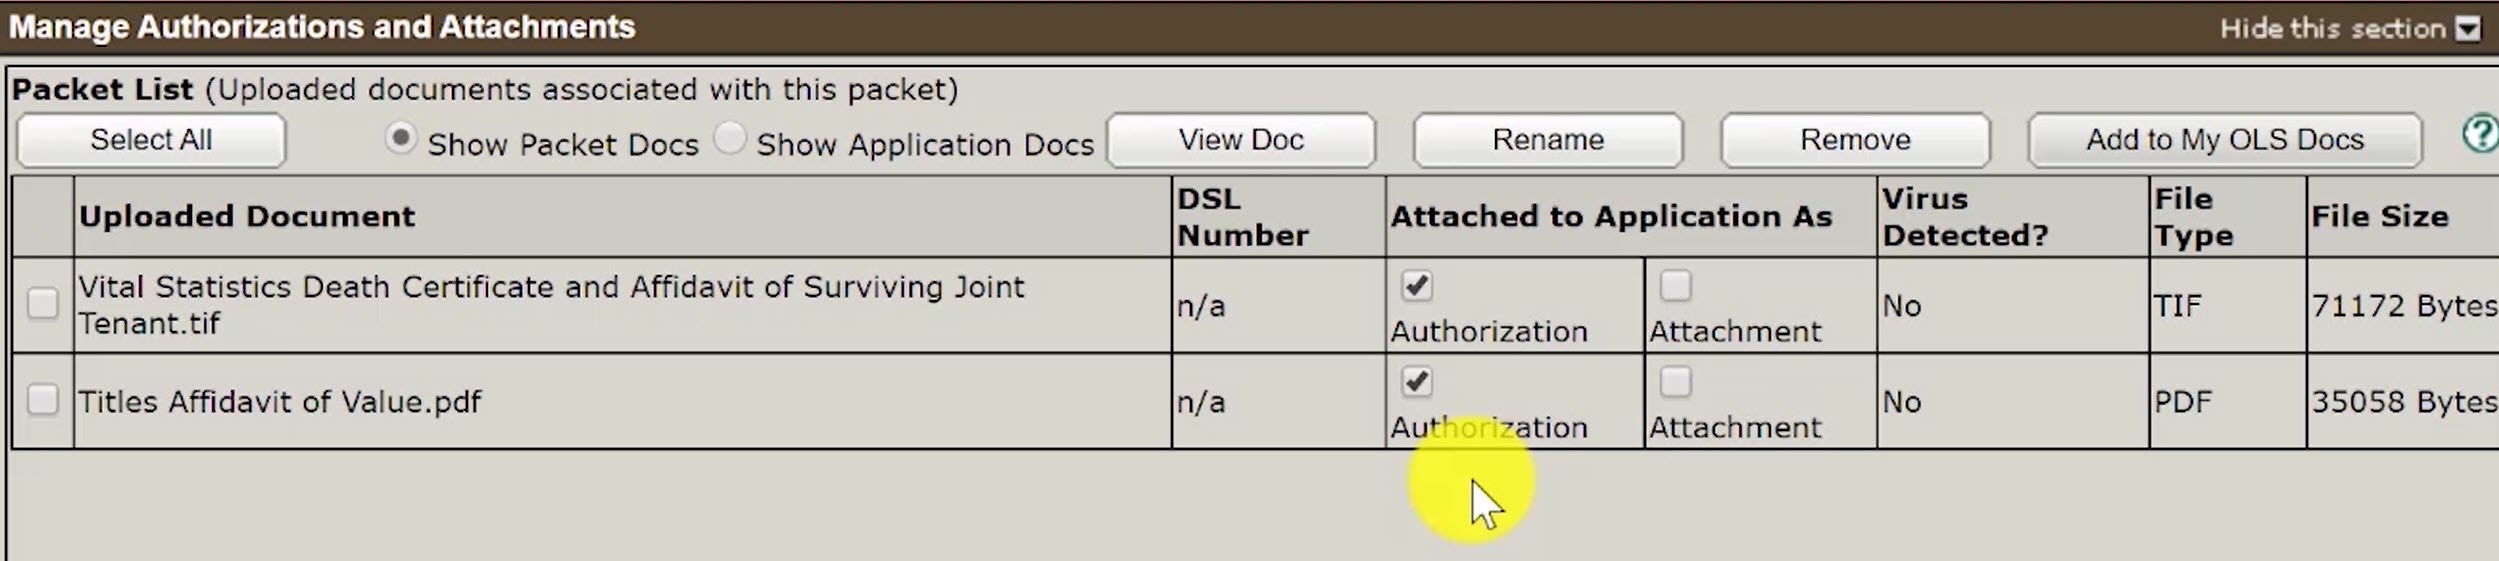
Step Eight: Upload Required Documents.
The required documents are the following:
1) A death certificate from Vital Statistics (or a Letters Probate or a Letter of Administration)
2) Affidavit of Surviving Joint Tenant
3) Affidavit of Value
Click on the 'New Upload' button to begin uploading the required documents.
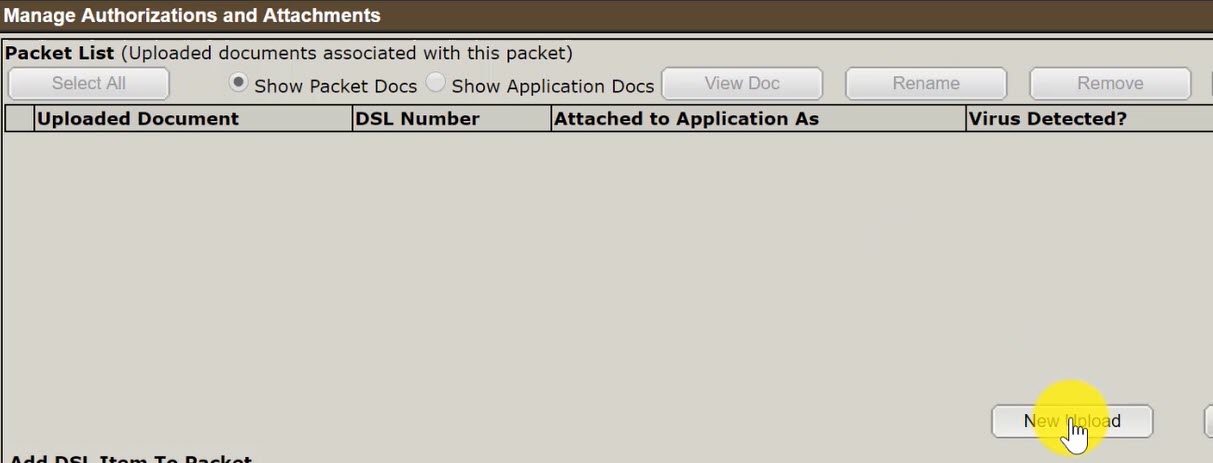
Once the required documents have been uploaded, label each document as an 'Authorization'.
Authorizations and attachments are documents that form part of the packet and are added to the packet prior to submission.
Step Nine: Validate your Packet
Validate your packet by clicking on the 'Validate' button.

You should Validate your application when you are satisfied that all required elements are correct. The validation process puts the packet through automated checks to help you ensure your application meets all the required business rules.
If errors are encountered, a message box will appear to let you know there were errors or warnings during the validation.

Click on the 'OK' and scroll down to the 'Validation Errors' section to see what errors were encountered.
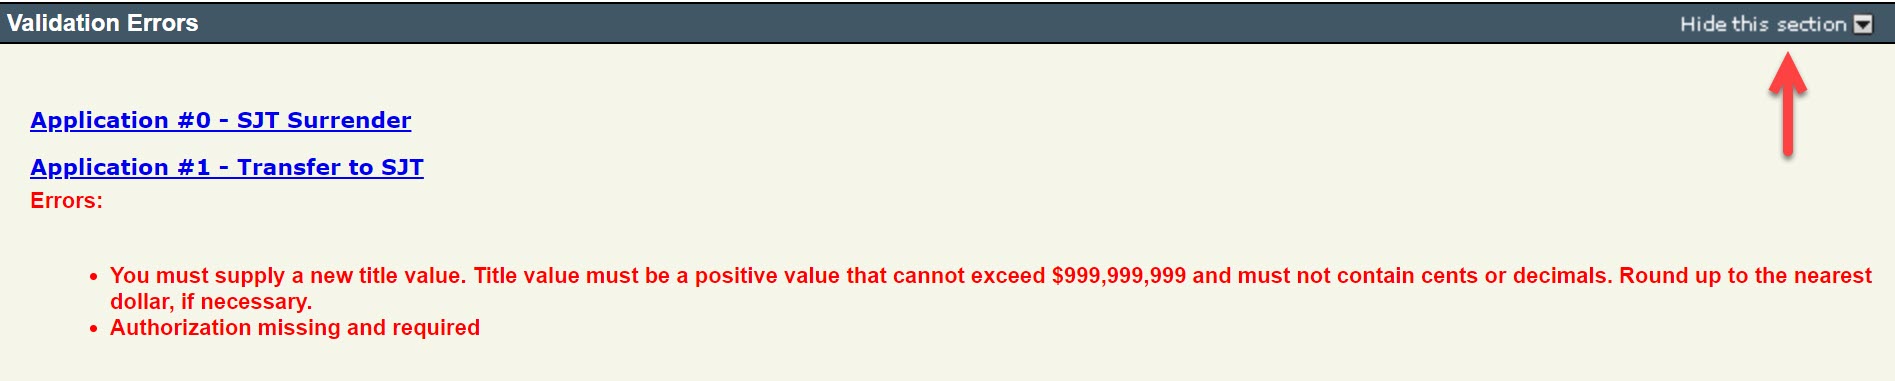
The 'Validation Errors' section might be hidden. Select the 'Show this section' to reveal the errors.
Validation generally take a couple of minutes depending on the size of your packet.
If there are no errors, you will receive an alert that there were no errors or warnings encountered during the validation.

Step Ten: Submit your Packet
Optional: You can create a summary report of your packet by clicking on the 'Create Summary Report'. The summary report will give you the opportunity to verify the accuracy of your packet.
 Once you have reviewed your summary report and are satisfied with the packet content, click on the 'Submit Packet' button to submit your packet.
Click on the 'OK' button to submit the packet.