The Change Delivery Option feature allows you the ability to manage your own delivery methods on a few different levels. You can manage the Default Delivery methods which will apply to all notices, or if you choose to, you can customize delivery methods for specific notices.
This section will outline how you can customize your delivery options for specific notices.
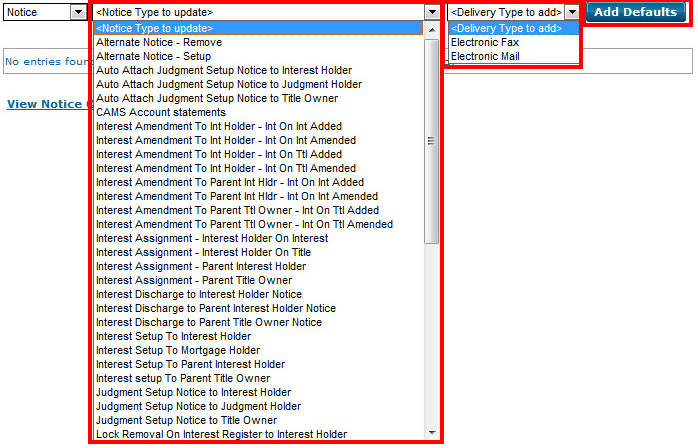
To manage notices, “Notice” must be selected from the dropdown.

Once selected, you will see the following screen:

Next you can choose a specific notice to manage from the drop down list. Once a notice is chosen, you can specify the delivery method and location/address the notice will be sent, or add a new location to send the notice.
 NOTE:
NOTE: The Default/Primary delivery methods you have are always located at the top of the screen.
There are a few options to choose from which will be explained in the next few sections.
Using Default Delivery
You can add their Default/Primary delivery methods to any notice by clicking the “Add Defaults” button. This is not necessary though as notices with no specifications automatically send to the listed Default/Primary locations.

Add Email
An email addresses can be added for a specific notice type that is not listed in the Default/Primary delivery methods.

Once you select electronic mail from the dropdown list on the right hand side you are prompted to enter an email address. Once it is entered and the Add Email button is clicked, a table shows up below showing that the address has been added. This is also where a you can choose to delete a specific email address that is listed.
NOTE: This address can be different than the Default/Primary addresses listed. Once you add an email through this process it overrides the Default/Primary list and becomes the only location the specific notice is delivered to.
You are allowed to enter multiple email addresses as shown below.
 Potential Errors
Error messages are generated at the top of the page. If you enter an invalid email address (e.g., missing the “@” symbol), the error will indicate that an invalid email has been entered.

Add Fax
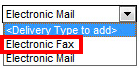
You can add fax numbers for a specific notice type that is not listed in the Default/Primary delivery methods by using the same process as email. You must choose the Electronic Fax option from the dropdown on the right hand side.
 Potential Errors
Error messages are generated at the top of the page. If an invalid fax number is added (e.g., invalid Area Code or Country Code), the error will specify which part of the fax number has been entered wrong.

Custom Delivery Options
You add any combination of fax numbers and email addresses to the list to create a custom delivery list for each different notice type.

Suppression
For specific notices you are given the option to suppress the notice. This means the notice will not be sent out or even generated at all.
These notices will bring up a check box for the customer to click that will show the notice is to be suppressed.

Note the message in red that states:
“Any notices you choose to suppress will not be generated by ISC. This means you will NOT be able to request a copy in the future.”
You can click the box a second time to remove the suppression of this notice and you will then receive the notices in the future, but if you have chosen to suppress a notice and a packet has been processed, ISC cannot get the notice for that packet.
Potential Errors
If you suppress a notice by accident, ISC cannot go back and generate that notice. Please turn off suppression by clicking the check box again to receive those notices in the future.
Notice Summary
A link to your Notice Output Summary is on all pages. This is a quick printer-friendly view of all of your output preferences.
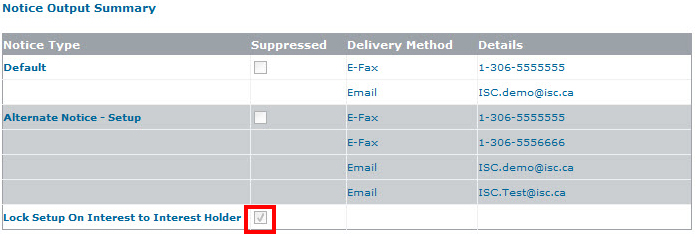
The image above shows the Default/Primary delivery methods and their preferences for specific notices. Note the bottom notice shows it has been suppressed by having the check box filled in. Notices that are not shown in this list are being sent to the Default/Primary delivery methods.
As well please note the button that allows a Printer Friendly version to be printed of for the customer’s records in the top right corner of the page.