To adjust video quality, select Settings  in the video player.
This is a tutorial on how to submit a Transfer in OLS. A Title Transfer is the process of changing ownership from one or more owners to one or more new owners.
This video depicts a basic title transfer scenario of how to add a name to your existing title for demonstration and training purposes only.
NOT LEGAL ADVICE
This video is meant for demonstration purposes and is not intended to provide legal advice.
ISC recommends seeking independent legal advice on all your land transactions.
Step One: Search for your title and select it for the application
To search for your title, you can search for your name by selecting 'Owner Name' in the ‘Search By’ drop down menu.
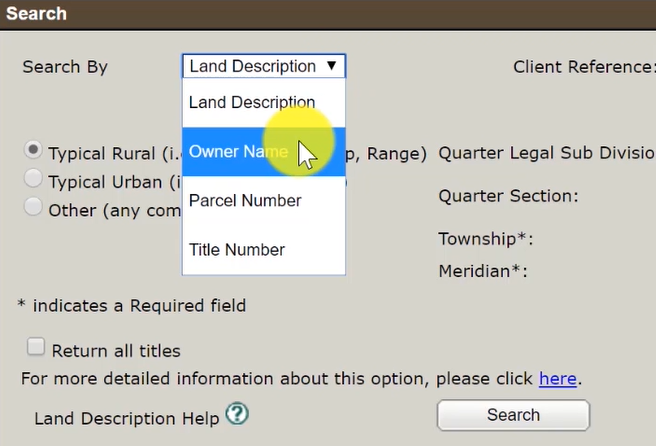
Then, type in the name of the current owner of the title being transferred.
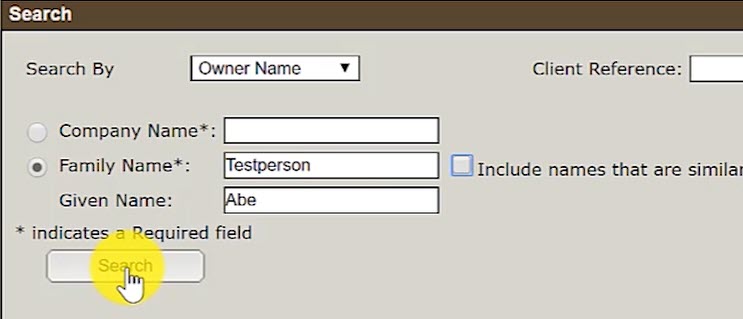
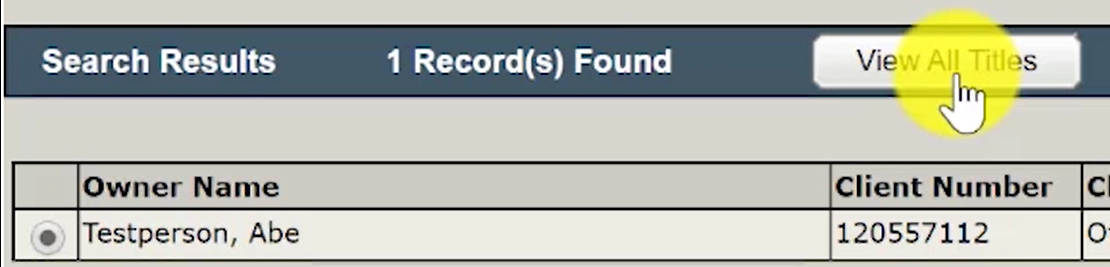
Select the radio button next to your name and click on ‘View All Titles’.
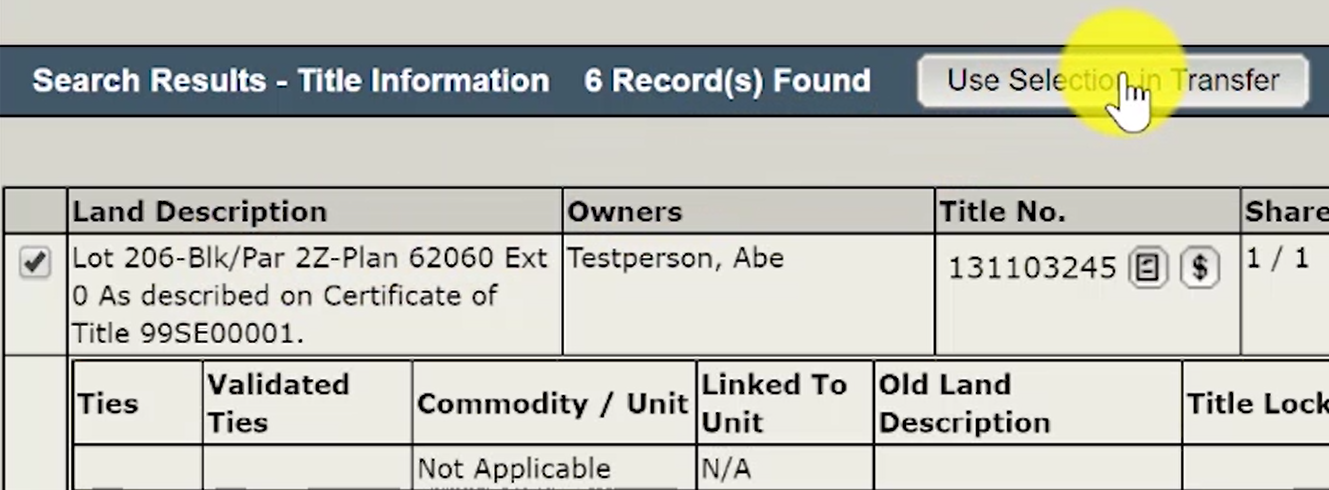
Look through the search results and locate your title. Select it by clicking on the checkbox. Then, click on 'Use Selection in Transfer'
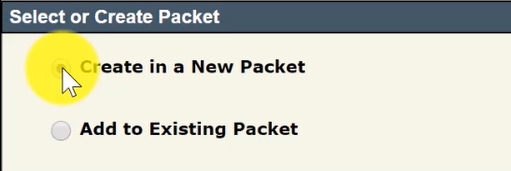
Step Two: Create New Packet
Select the 'Create New Packet' radio button.
Step Three: Select 'Title Transfer' as transaction type and Begin Setup
Click on the radio button for 'Title Transfer' in the Transaction Type section.
The title(s) that you selected will be automatically added to the current transaction.
Click on the checkbox next to the titles that you wish to add a name to and select 'Begin Setup'.
Step Four: Select Ownership Type
There are different options for Ownership Type. To learn more about the different ownership types, see 'Choosing Ownership Type'.
Single Owner - A single individual, a single corporate entity, or another single relevant part (as listed in The Land Titles Act, 2000 or The Land Titles Regulations, 2001) owns one title.
Tenant in Common - Two or more individuals own a portion or a fractional share in a parcel, with one title being created for each Tenant in Common. For example, two owners with equal shares would each have a title with 1/2 ownership and be able to deal with their respective share separately.
Joint Tenants - Two or more individuals own one title. There is an automatic right of survivorship should one of the owners die.
Joint Tenants with no Survivorship - Two or more individuals own one title. If one of the other joint owners die, no right of survivorship exists. This structure is most commonly used when owners are trustees and the trust document specifically directs the trustees to hold the title on this basis.
A 'Joint Tenants' scenario is being used in this example.
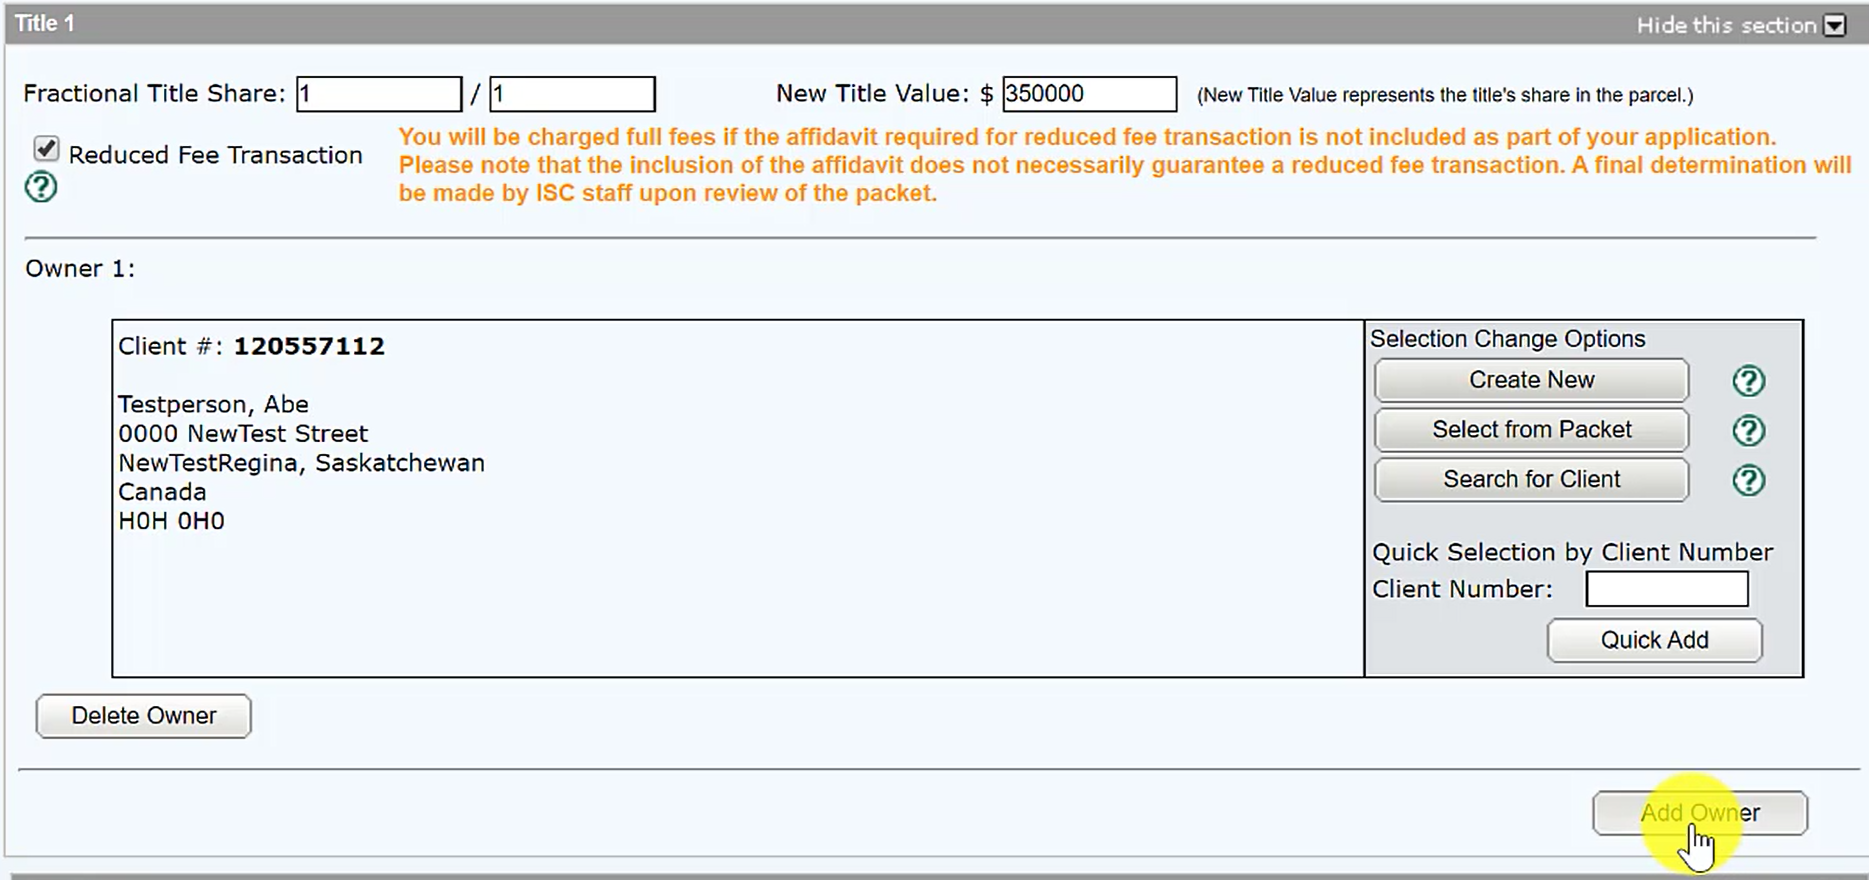
Enter the Fractional Title Share as well as the New Title Value for this title's share in the parcel.
In a joint tenant situation, the fractional share is the complete share in that title; both owners have the equal and undivided right to the property.
The New Title Value should be rounded down to the nearest dollar and be consistent with the value in the affidavit of value.
When adding a name to your title with at least one owner remaining the same, you may qualify for a "Reduced Fee Transaction". If approved by ISC, your fees can be reduced from 0.3% of the title value to 0.1% of the title value.
Step Five: Add your name and the new owner to the owners list
Select 'Search for Client' and search for your own name.
Note: If the individual you want to add does not have a client number (e.g. user account) with ISC, select the 'Create New' option to create one for them.
After adding your name, click on the '
Add Owner' button to add another name.
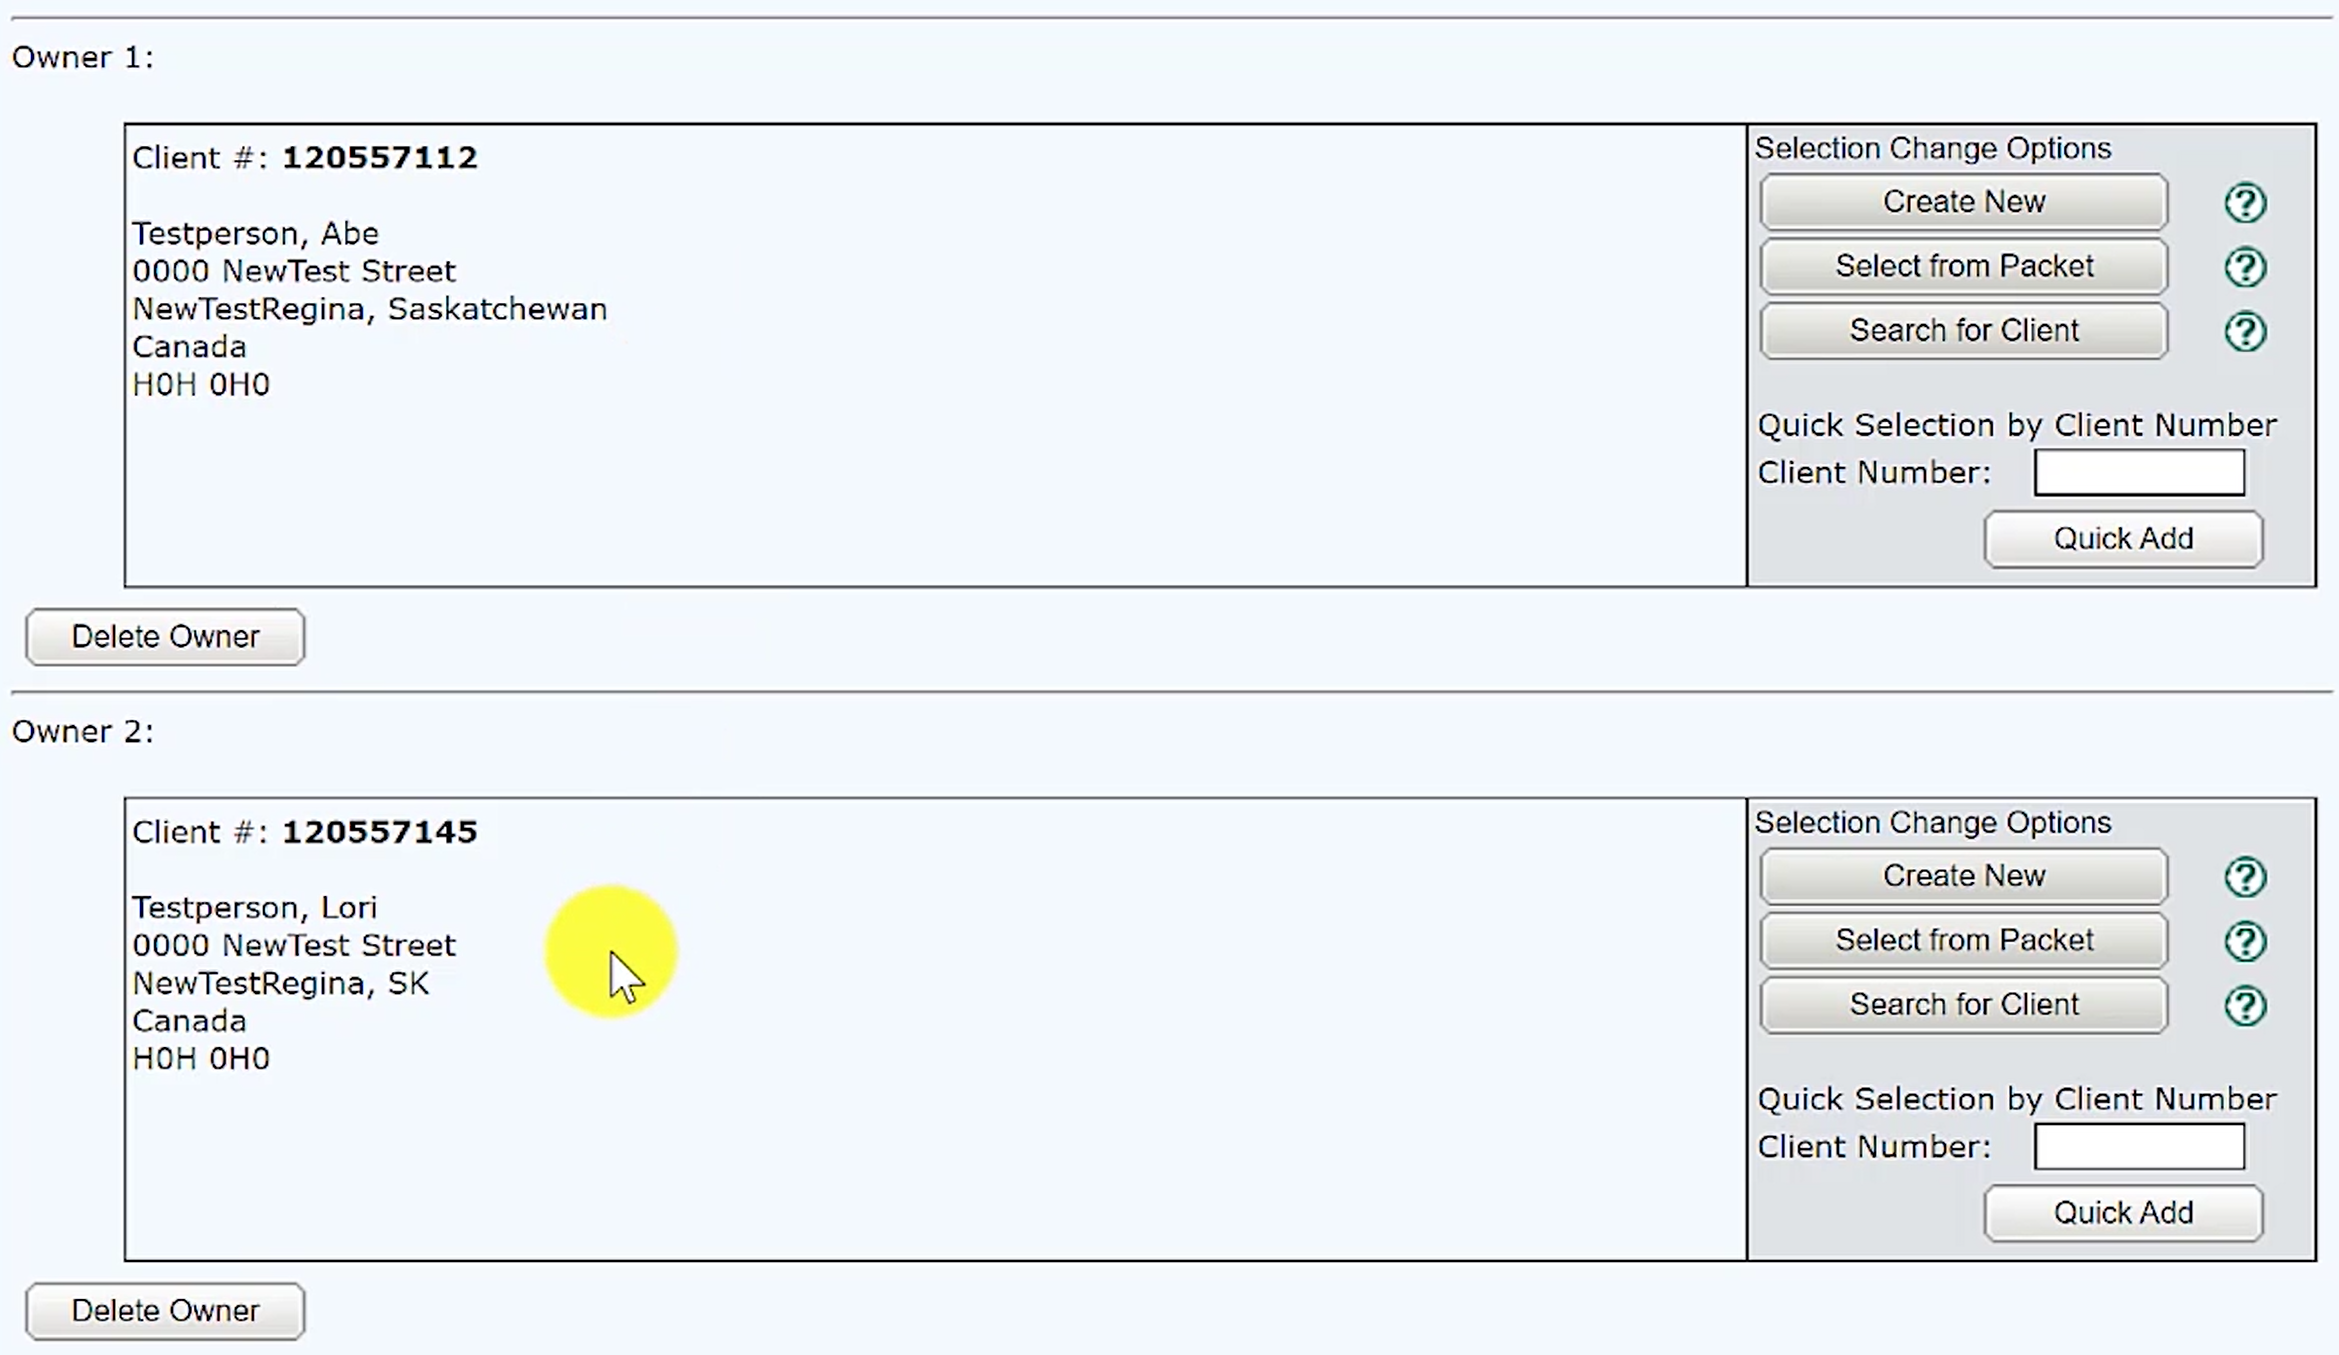
It should look like the image below once both owners have been added.
Step Six: Select Conditions
No Conditions - This means you will accept registration of the changes subject to any interests registered against the title or existing in the Judgement Registry at the time the application is processed.
Free and Clear - This means you will accept the registration only if there are no interests on the title at the time the application is processed.
Conditional Registration - This means you will accept registration of the transfer subject to interests registered on the title or existing in the Judgment Registry at a particular date and time the title was searched.
Step Seven: Upload Required Documents
Required Documents are:
- A signed transfer authorization
- Affidavit of value
- Affidavit of reduced fee transaction (*if one of the former owners will be one of the new owners)
Start by clicking on 'New Upload'.
A new window will open that will allow you to upload the required documents from your computer.
Select the 'Upload' button to upload all your documents. When complete, click on 'Done'.
Once the documents are uploaded, you have the option to select either 'Authorization' or 'Attachment' for each document..
Step Eight: Validate for Errors
Validate your packet by clicking on the 'Validate' button.
You should validate your application when you are satisfied that all required elements are correct. The validation process puts the packet through automated checks to help you ensure your application meets all the required business rules.
If errors are encountered, a message box will appear to let you know there were errors or warnings during the validation.
Click on the 'OK' and scroll down to the 'Validation Errors' section to see what errors were encountered.
 The 'Validation Errors' section might be hidden. Select the 'Show this section' to reveal the errors.
Validation generally take a couple of minutes depending on the size of your packet.
The 'Validation Errors' section might be hidden. Select the 'Show this section' to reveal the errors.
Validation generally take a couple of minutes depending on the size of your packet.
If there are no errors, you will receive an alert that there were no errors or warnings encountered during the validation.
Step Nine: Create a Summary Report and Submit the Packet
Optional: Click on the 'Create Summary Report' button to create a summary report of your packet. The summary report will give you the opportunity to verify the accuracy of your packet.
 Once you are satisfied with the packet content, click on the 'Submit Packet' button to submit your packet.
A new window will appear to allow you to review the high level information about your packet including estimated fees.
Click on the 'OK' button to submit the packet.