Step 2:
Steps for Option 2
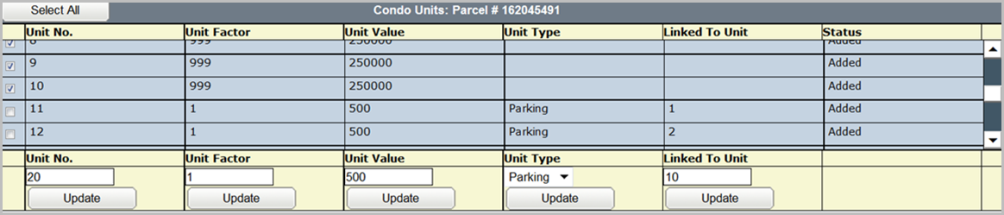
In this scenario, there will be 10 residential units, all with the same unit factor and title value, and 10 parking units. Each parking unit will link to one of the residential units. The parking units will have a different unit factor and title value than the residential units.
If you have a combination of residential units and parking units, you may choose to do the residential units as one bulk setup and then parking units as a second bulk setup. All the units in a bulk setup will have the same information.
If the units have many different values, it may be best to leave that portion of the bulk setup blank and go back to enter the title value in each individual setup. See the section on
How to Edit Unit Setups.
After entering all of the residential units and parking units in the
Condo Units grid, take the following steps:
Select the checkbox preceding the new target parcel in the
New Parcel(s) section of the TAC.

Select each of the residential units that are to be set up. You can do so by clicking the
Select All button in the top left hand corner of the
Condo Units grid and then either deselecting all the parking unit checkboxes
or selecting the checkbox for each residential unit individually.
Use the white scroll bar on the right hand side of the
Condo Units grid to view all units in the grid.
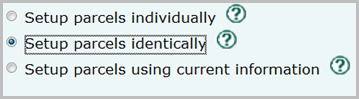
Click the
Setup parcels identically radio button.

Click the
Begin Setup button. The
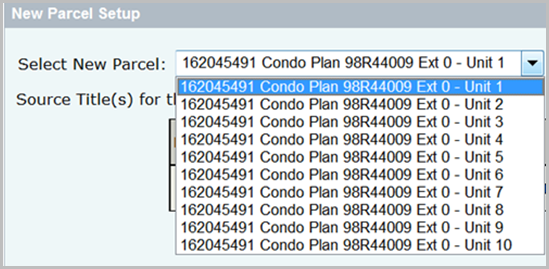
New Parcel Setup screen will display, with
Bulk Setup showing in the
Select New Parcel dropdown menu.

The screen will also display the condominium units that you chose to have set up identically, and will list them as a group. This is known as a
bulk setup.
The information entered in the first setup will be applied to all the units that were selected. Once the information is entered into the initial setup and the
Save button is selected, the units will be distinguishable from each other. Each one will have a different unit number.
The screen will also show the source parcel(s) that has been surrendered in favour of the new target parcel for the bulk setup.
Select the
New Owner(s) radio button.
Fill in the
Fractional Title Share and the
New Title Value fields, as well as the
Owner 1 section. Ensure you have selected the appropriate
Conditions option (the step-by-step instructions for these actions are located in the
How to Complete the Ownership Section and
How to Complete the Conditions of Registration help pages).
Click the
Save button.
Scroll back up to the
Select New Parcel dropdown in the
New Parcel Setup section. Each condominium unit will be easily identifiable so that if you have to go in and change any information such as the title value, it will be easy to do so.
Once you have saved, scroll back to the TAC near the top of the screen. The setups that were part of the bulk setup will display in the
Setup Item(s) column.

Re-select the target parcel checkbox.
Select the parking units that will be part of the bulk setup. Again, you can click the
Select All button and deselect all the residential units
or select each of the parking units separately.
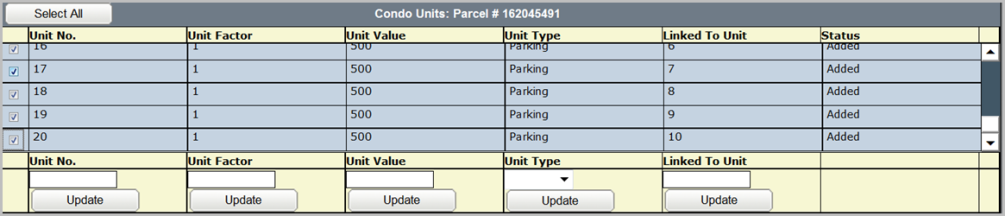
Use the white scroll bar on the right hand side of the
Condo Units grid to view all units in the grid.
Click the
Setup parcels identically radio button.
Click the
Begin Setup button. The system will display the
New Parcel Setup section, with
Bulk Setup showing in the
Select New Parcel dropdown menu.

Now, for the parking units, fill in the
Fractional Title Share and the
New Title Value fields, as well as the
Owner 1 section. Ensure you have selected the appropriate
Conditions option (the step-by-step instructions for these actions are located in the
How to Complete the Ownership Section and
How to Complete the Conditions of Registration help pages).
Click the
Save button. The parking units you chose to set up identically within the bulk setup will be split into the corresponding parking units.

Once you have saved, scroll back to the TAC near the top of the screen. The parking setups that were part of the bulk setup will display in the
Setup Item(s) column, along with the residential units previously set up.
Continue to the
How to Manage Authorizations and Attachments help page.